Academy tutorial
How to Create Markerless AR
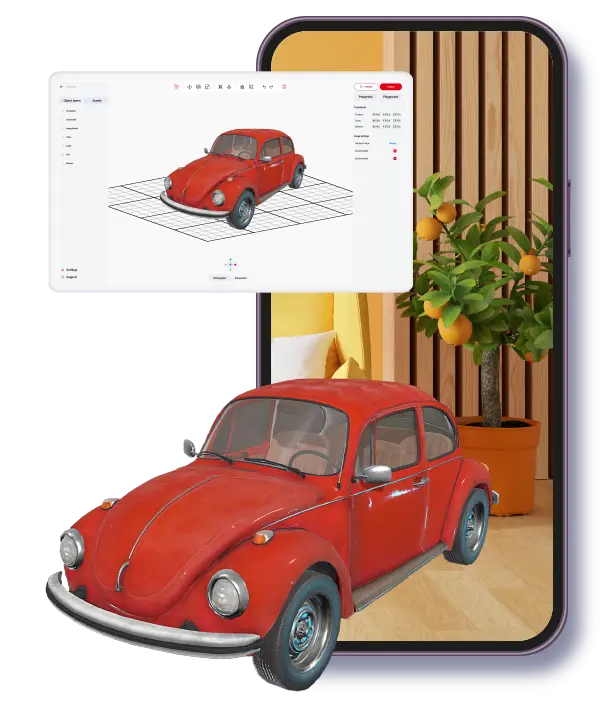
Markerless AR lets users place content on a real surface instead of scanning a printed marker. It is useful for product visualization, classroom objects, interior previews, and any experience where the user should decide where the object appears.
Best for
Product previews, furniture-scale objects, educational models, prototypes, and experiences that need real surface placement.
Watch out for
Large or heavy 3D assets can make placement slow or unstable on mobile devices.
ARLOOPA fit
ARLOOPA Studio helps teams create markerless experiences while waiting for a refreshed current Academy tutorial video.
Definition
What markerless or surface AR is
Markerless AR uses the phone camera and device sensors to detect a real surface, then places digital content into that environment. The user does not need a printed image trigger. They open the experience, find a surface, and place the object.
This format works best when the value comes from seeing scale, placement, or context. A product, educational model, or display object can be reviewed in the real environment where it matters.
- •Use markerless AR when the user should choose the placement surface.
- •Keep the first placement simple and easy to understand.
- •Avoid forcing markerless AR when a printed marker would be more reliable.
Use cases
Product visualization use cases
Product visualization is one of the clearest uses for markerless AR. Users can place a chair in a room, preview a product on a table, inspect a model at approximate scale, or compare a concept with the physical environment around them.
For sales and marketing, markerless AR is strongest when it answers a practical question: how big is it, how does it look in this space, or how does it compare with what is already here?
- •Furniture, consumer goods, devices, packaging mockups, and display objects.
- •Sales enablement demos where teams need to show scale quickly.
- •Education projects where students place models on desks or floors.
Assets
How to prepare 3D assets
Markerless AR depends heavily on the quality of the 3D asset. Keep the file optimized, set a sensible real-world scale, and make the first view understandable from the angle users are likely to see.
If the asset is too detailed, the experience may load slowly. If the scale is wrong, the result can feel unrealistic even if the model looks good.
- •Use optimized GLB assets when possible.
- •Check scale before publishing, especially for furniture and product previews.
- •Remove unnecessary model complexity if mobile loading feels slow.
- •Use ARLOOPA Factory or Genie AI when you need a starter 3D asset quickly.
Studio steps
How to create markerless AR in Studio
The markerless workflow starts with the AR type, then the content. The main difference from marker-based AR is that the user will place the content on a surface instead of scanning a trigger image.
Publish a test version early and test in the real environment because surface detection depends on lighting, texture, and device behavior.
- 1Open ARLOOPA Studio and choose markerless AR.
- 2Choose the destination path for the experience.
- 3Select the content type, usually a 3D model for surface placement.
- 4Upload or create the asset and adjust its default scale.
- 5Preview the scene and publish a test version.
- 6Open the experience on a phone and test placement on several surfaces.
- 7Adjust scale, file weight, and instructions before public launch.
Mobile testing
Testing markerless AR on mobile
Mobile testing should include different surfaces, lighting, and distances. A model that places well on a textured table may not place as easily on a plain white floor or in low light.
Watch the first 10 seconds carefully. If users do not understand where to point the camera or where to tap, simplify the instructions and placement flow.
- •Test on the devices and browsers your audience is likely to use.
- •Use surfaces with enough visual texture for tracking.
- •Check whether the asset appears at a believable size.
- •Compress heavy models before launch.
FAQ
How to Create Markerless AR FAQ
What is markerless AR?
Markerless AR lets users place digital content on real-world surfaces without scanning a printed marker image.
What is markerless AR best for?
It is best for product visualization, furniture previews, classroom objects, prototypes, and experiences where real-world placement matters.
Do markerless AR experiences need 3D models?
They often use 3D models, but the exact content depends on the project. Product and education use cases usually work best with optimized 3D assets.
Why should I test markerless AR on a phone?
Surface detection, loading, scale, and user instructions can behave differently on real devices than they do in a desktop preview.
Why is there no video embedded here?
The available markerless Academy tutorial was published before the current-Studio cutoff for this update, so the page does not embed outdated UI footage.
Existing Studio pages
Related Solutions
Use these established Studio pages when you need deeper solution or industry detail beyond this guide.
Product Visualization
Help buyers understand products in 3D and AR before purchase. Build product demos, placement previews, and interactive product stories without coding.
Open pageEducation
Create AR lessons, learning cards, classroom posters, and educational WebAR experiences that help students explore concepts in 3D without extra app friction.
Open pagePricing
Compare ARLOOPA Studio pricing plans for WebAR, geospatial AR, image tracking, and no-code AR creation, and choose the right option for your team or business.
Open pageContinue reading
Related Reading
These supporting guides answer the next practical questions readers usually have before launching an AR project.
ARLOOPA Factory to Studio 3D Model
Scan a real object with ARLOOPA Factory, download the 3D model, and use it inside ARLOOPA Studio for augmented reality.
Read guideText-to-3D AI for Augmented Reality
Generate 3D models from text prompts with Genie AI and use them in augmented reality experiences built in ARLOOPA Studio.
Read guideHow to Create a 3D Model AR Experience
Use the 3D file content type to place uploaded models inside marker, surface, location, face, or geospatial AR flows.
Read guideMarkerless WebAR Experiences
Use this guide to plan markerless WebAR experiences with clear interaction logic and practical rollout discipline.
Read guide