How-to guide

How to Create Marker-Based WebAR

Marker-based WebAR is the browser-delivered version of the marker-based create flow. In Studio, the path starts the same way as regular marker-based AR: choose the marker-based format and upload the image users will scan. The main difference comes in the destination step, where you choose `Web AR` instead of the ARLOOPA app. That makes this flow useful for campaigns that want the clarity of image-triggered AR without asking the audience to install an app first.

WebAR technology preview

Best for

Packaging, posters, print campaigns, and event materials where fast browser entry matters more than a deeper app environment.

Watch out for

You still need a strong marker and a clear camera-permission moment, so browser delivery does not remove the need for real scan testing.

ARLOOPA fit

ARLOOPA Studio is useful here because it combines a no-code marker workflow with a browser destination instead of forcing teams into a custom WebAR stack.

Tutorials

Video tutorials for this workflow

Watch the matching Studio walkthrough before you build so the setup, asset choices, and publishing steps are easier to follow.

How to create Web AR

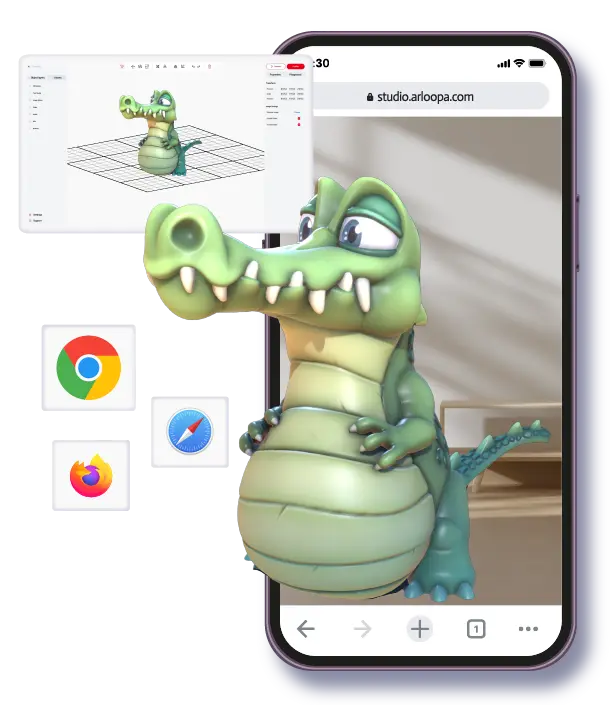
In this tutorial, you’ll learn how to create and publish Web AR experiences using ARLOOPA Studio. WebAR allows users to access augmented reality directly through a web browser—no app download needed! Just scan a QR code or click a link to instantly view AR content.

How to create Marker-Based AR with 3D model

In this step-by-step tutorial, you'll learn how to create image tracking AR experiences (also known as marker-based AR) using ARLOOPA Studio. We'll guide you through the entire process—from selecting your image marker to uploading a 3D model and publishing the AR experience. Perfect for educators, creators, and AR enthusiasts who want to bring printed materials, posters, books, or artworks to life with engaging video content.

Use case fit

When marker-based WebAR is the right choice

Choose marker-based WebAR when the trigger should stay image-based but the entry point should stay light. This is the best path when marketing teams want a QR code, poster, or printed instruction to open a browser experience instead of pushing the audience toward app installation.

The format is especially useful for time-sensitive campaigns or environments where users may only interact once. It keeps the onboarding short while still tying the AR layer to a controlled printed image.

  • Use it when you want a scan-triggered AR experience with no app download.
  • Use it for one-off or campaign-led interactions where friction needs to stay low.
  • Avoid it when the project depends on a deeper native app environment or repeat app engagement.

Studio steps

How to create marker-based WebAR in ARLOOPA Studio

This is the marker-based flow with a browser destination. The build steps are almost the same as regular marker-based AR, but you choose `Web AR` so people can open it without installing an app.

The main thing to validate after publishing is the full phone journey: scan, camera permission, load time, and the content that appears after the marker is recognized.

Before you publish, use the Studio preview to confirm the marker setup and content are correct.

  1. 1Click `Create experience` in Studio.
  2. 2Choose `Marker-Based AR` on the first screen.
  3. 3When Studio asks for the destination, click `Web AR`.
  4. 4Upload the image people will scan as the marker.
  5. 5Choose the content type you want to open in the browser.
  6. 6Upload or generate the asset and check the browser preview in Studio.
  7. 7Click `Publish` to generate the live browser experience.
  8. 8Open the published experience on a real phone and test the full scan-to-browser flow.

Preparation

What to prepare for a browser-based marker flow

The key preparation point is not just the marker image. It is the whole handoff from printed trigger to browser camera session. Teams should think about how the user discovers the scan, what instructions are visible on the printed asset, and whether the network and browser context are realistic for the place where the experience will be opened.

It also helps to keep the first interaction short. Marker-based WebAR works best when the viewer gets to the value quickly instead of waiting through a heavy scene before they understand why the scan mattered.

  • Use clear scan instructions on the physical trigger or nearby CTA.
  • Optimize media sizes for browser delivery and mobile data conditions.
  • Test on multiple devices and browsers, not only one internal test phone.
  • Plan the first three seconds of the experience carefully so the browser flow feels worth the scan.

Launch guidance

Where marker-based WebAR usually works best

This flow is strongest in campaigns where wide reach and easy access matter. That includes product packaging, promotional posters, trade-show collateral, direct mail, print ads, and educational handouts that need one clear scan path with low friction.

It is less about depth and more about smooth entry. If your audience is unlikely to install an app for one interaction, marker-based WebAR is often the simplest way to preserve image-based activation without losing too many users at the first step.

  • Fast consumer campaigns tied to packaging or print.
  • Event materials where the experience must open immediately in the browser.
  • Education or museum handouts that need a simple mobile scan path.
  • Promotional assets that benefit from app-free distribution.

FAQ

How to Create Marker-Based WebAR FAQ

What changes when I choose Web AR in the marker-based flow?

The trigger image still powers recognition, but the published experience opens in the browser instead of in the ARLOOPA app.

Is marker-based WebAR good for packaging?

Yes. It is often one of the best fits because it keeps the packaging-trigger logic while reducing entry friction for the end user.

Do I still need to upload a marker image?

Yes. The WebAR destination does not remove the marker step. The image still needs to be uploaded and tested as the trigger.

What is the main risk in marker-based WebAR?

Teams sometimes focus only on the AR layer and forget the browser onboarding. Marker quality, camera permission, and load speed all matter.

Next step

Need help turning a how-to guide into a launch plan?

Use pricing and a live demo to validate the workflow, publishing path, and rollout scope before you build at full scale.

Existing Studio pages

Related Solutions

Use these established Studio pages when you need deeper solution or industry detail beyond this guide.

Continue reading

Related Reading

These supporting guides answer the next practical questions readers usually have before launching an AR project.


ARLOOPA Inc. 2026