1
Upload your best dish photo
Pick a close, well-lit shot with visible texture: grill marks, herbs, crumbs and garnish. This exact image becomes the scan target on the printed menu.
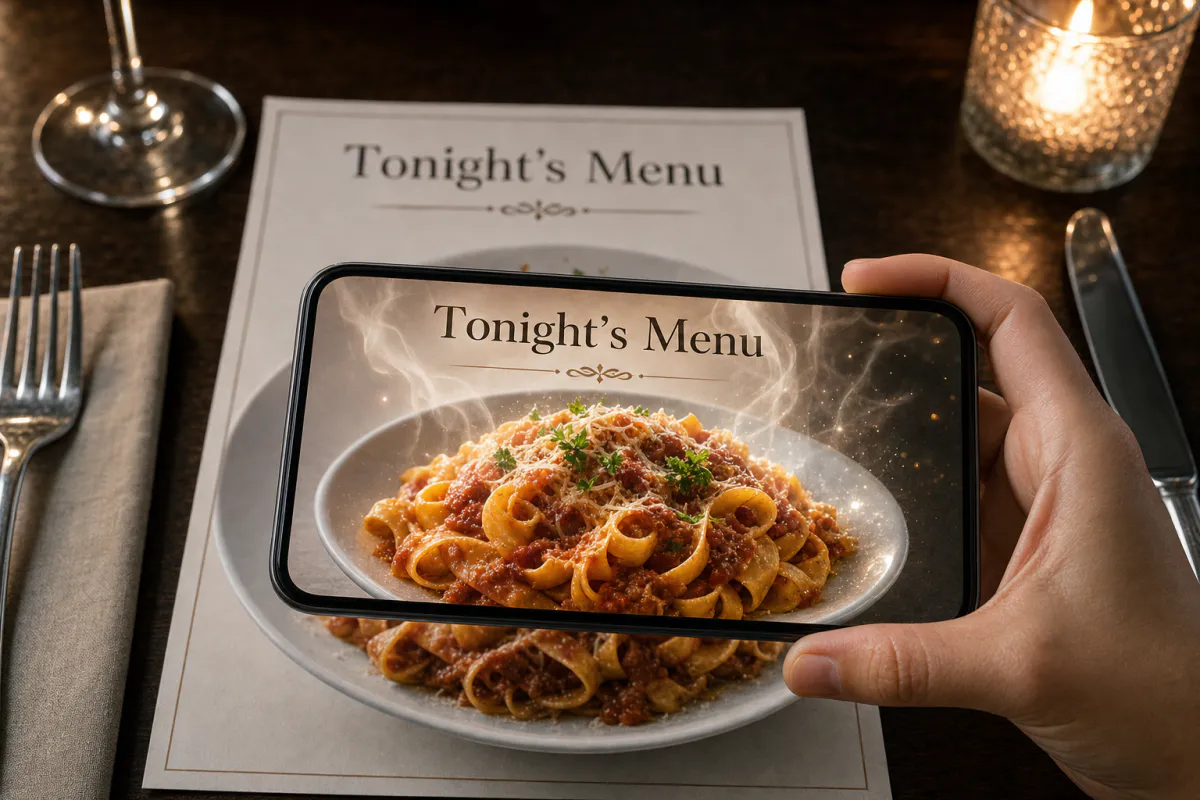
Give guests a reason to linger over the menu. Upload a photo of a signature dish, and Studio generates a short AI animation, with steam rising, sauces glistening and light moving across the plate, that plays right on top of the printed menu when someone points a phone at it.
Best for
Signature dish pages, table tents, specials boards, dessert cards and window menus for restaurants, cafés, bars and food trucks.
What it creates
An image-tracking AR experience anchored to one dish photo, opened from a QR code in the phone browser or in the ARLOOPA app.
What stays sharp
The preset prompt asks the AI to keep your logo, menu text and plating unchanged, so only the food comes alive.
Step by step
The builder opens with the restaurant menu preset: an appetizing motion prompt for food photography that leaves branding and text untouched.
Pick a close, well-lit shot with visible texture: grill marks, herbs, crumbs and garnish. This exact image becomes the scan target on the printed menu.
Keep the steam and glistening sauce, or describe your dish in up to 300 characters, such as cheese stretching from a slice or foam settling on a coffee.
Give the experience a clear name like "Spring menu – pasta" and select Web AR for guests without the app, the ARLOOPA app, or both.
Studio shows the coin estimate first, then creates a five-second AI video that plays over the photo when the menu is scanned.
Add the QR code next to the photo with a short line like "Scan the dish", print a test copy and scan it under your dining room lighting.
Why it works
Most guests decide what to order in the few minutes they spend with the menu. A dish that visibly steams and sizzles on their phone makes a stronger case than a line of description, and it is the kind of moment people show to the rest of the table.
Because the animation is generated from your own food photo, it shows the plate you actually serve. Review the result before printing and regenerate with a tighter prompt if the AI adds anything that is not on the dish, so the AR stays an honest preview.
Print and tracking
Restaurant lighting is the main challenge. Glossy lamination reflects pendant lamps and candles as bright patches that hide parts of the photo from the camera, so choose matte or soft-touch lamination, or a matte paper menu replaced each season.
Size matters too. Give the dish photo a generous block on the page rather than a thumbnail, keep text and prices out of the photo area, and avoid placing it across a fold, where the crease breaks the image the camera is looking for.
Go further
After generating, open the experience in the Studio editor to add more than the animation. A button can open your online ordering page, a reservation link or allergen information, and audio or a 3D model of the dish can sit next to the photo.
The analytics page shows how many views each experience gets. Create one experience per dish or per location, and you can see which plates guests scan most and which tables or windows bring the most attention.
FAQ
No, if you publish as WebAR. Guests scan the QR code with their phone camera, the experience opens in the browser, and they point the phone at the dish photo.
The preset asks the AI to keep products, logos and text unchanged and only add motion like steam and shine. Always watch the result before printing, and edit the prompt and regenerate if anything looks different from the real plate.
Yes. Each dish photo is its own experience with its own scan target, so create one per dish you want to feature and place a QR code beside each.
Keep prices outside the dish photo. Then you can reprint the menu with new prices and the same photo, and the AR keeps working.
More templates
Every occasion uses the same quick workflow: upload a photo, add AI motion, share as WebAR.
AR event poster template
Concerts, club nights, festivals, theater runs, conferences, exhibitions, sports fixtures and product launches.
See the guideReal estate AR flyer template
Listing flyers, open house handouts, just-listed postcards, window cards at the agency and new development brochures.
See the guideAR children’s book page template
Picture books, early readers, activity books, classroom worksheets, book covers and promotional bookmarks.
See the guide


Solutions
ARLOOPA Inc. 2026